
The Art of Color Harmony in Wildlife Photography
- Jayanta Guha
- Sep 22, 2025
- 7 min read


When we think of wildlife photography, our minds often go straight to sharpness, timing, and subject behavior. But there’s another silent element that makes an image truly unforgettable — color harmony. The way colors work together can transform a simple photo into a piece of art that evokes emotion, balance, and beauty.
In this blog, I’ll walk you through color harmony, how we use it in wildlife and nature photography, why it’s so important, and how small changes in editing (like color shifting) can make or break an image.
What is Color Harmony in Photography?
Color harmony is the pleasing arrangement of colors in an image based on color theory. Our eyes naturally seek balance, and when colors complement each other, the photo feels more natural and impactful.
In photography, color harmony isn’t about random colors — it’s about using combinations that either calm the viewer, create tension, or guide emotions.
Understanding Color Theory
At the heart of color harmony lies the color wheel — a circular representation of colors. From it, we get relationships like:
Complementary colors: Opposites on the wheel (e.g., orange & blue).
Analogous colors: Next to each other (e.g., green, yellow, orange).
Triadic colors: Evenly spaced three colors (e.g., red, blue, yellow).
Monochromatic: Shades and tones of a single color.
Split-complementary & tetradic: More advanced combinations.
Each has its place in wildlife photography, depending on mood, species, and environment.
Here’s the visual chart of color harmonies across the color wheel. It shows how different schemes (monochromatic, analogous, complementary, triadic, tetradic, etc.) are positioned and balanced.

Types of Color Harmony in Wildlife Photography (with examples)
1. Complementary Colors
Opposite colors create vivid contrast.
Definition: Uses two colors that are opposite each other on the color wheel (like red & green, blue & orange, yellow & purple).
Effect: High contrast, vibrant, energetic. Creates visual tension and drama.
Example in photography: A sunset (orange sky) with a silhouetted mountain (blue shadows).
When to use: To make subjects pop or to create powerful, dynamic compositions.
Why it works: The natural contrast draws immediate attention to the bird.

2. Analogous Colors
Colors next to each other on the wheel feel calm and unified.
Definition: Uses colors that sit next to each other on the color wheel (like blue-green, green, yellow-green).
Effect: Natural, pleasing, and harmonious—often found in nature.
Example in photography: A forest shot with greens, yellows, and a touch of brown.
When to use: For a sense of unity and flow, while still offering variety.
Why it works: It blends subject with habitat but keeps flow and mood consistent.

Example Of Analogue Color Harmony 
Example Of Analogue Color Harmony 
Example Of Analogue Color Harmony
3. Triadic Colors
Three evenly spaced colors create playful vibrance.
Definition: Uses three colors evenly spaced around the color wheel (like red-yellow-blue or green-orange-purple).
Effect: Balanced but colorful, playful, and vibrant.
Example in photography: A festival scene with bright clothing—reds, blues, and yellows creating dynamic energy.
When to use: To create bold, eye-catching images with balance across the frame.
Why it works: The bird itself is the triadic harmony, and nature provides the neutral backdrop.


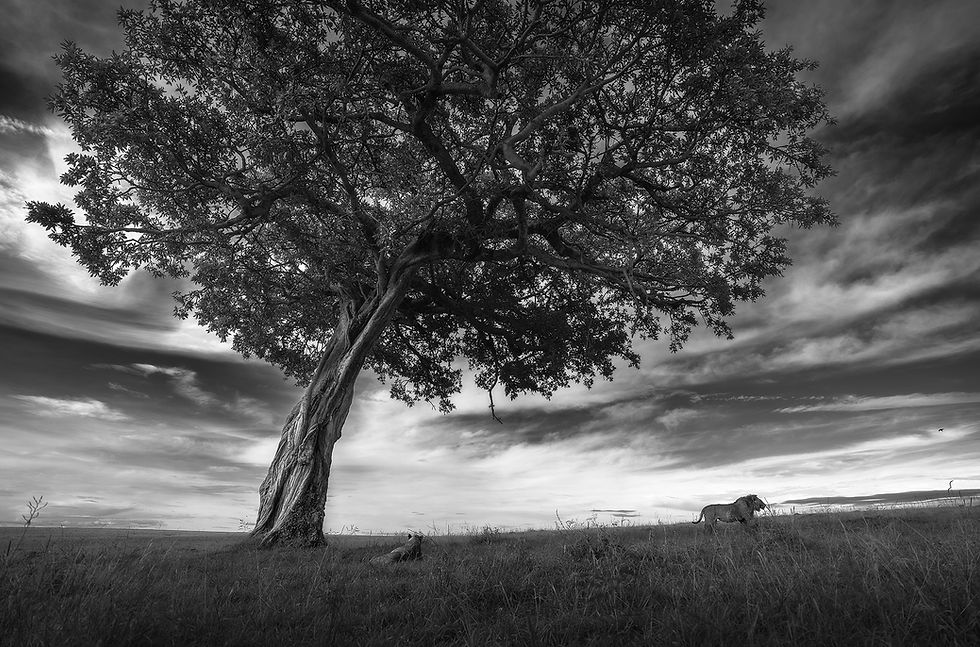
4. Monochromatic Colors
Different shades of one color feel minimalistic and artistic.
Definition: Uses a single hue (color) with variations in saturation (intensity) and brightness (lightness/darkness).
Effect: Simple, elegant, and soothing. Creates a unified, minimal look.
Example in photography: A foggy morning scene with only shades of blue-gray, or a desert image with warm browns and beiges.
When to use: To convey calmness, simplicity, or focus on form/subject rather than distractions.
Why it works: It emphasizes texture, pattern, and subject blending into habitat.


5. Split-Complementary
A base color plus the two colors adjacent to its opposite. Creates contrast with less tension.
Definition: A twist on complementary colors. Uses one base color + the two colors adjacent to its complement.
Effect: Balanced yet lively, avoids the harsh contrast of direct complementary schemes.
Example in photography: A teal sea (blue-green) with accents of coral pink (red-orange) and golden sand (yellow-orange).
When to use: For portraits, landscapes, or wildlife when you want contrast without overwhelming intensity.
Why it works: Softens the punch of full complementary but still guides the eye.


6. Tetradic (Double Complementary)
Two pairs of complementary colors — rich but tricky to balance.
Definition: Uses four colors in two complementary pairs (like blue & orange + green & red).
Effect: Rich and diverse, but tricky to balance. Best when one color dominates and others are accents.
Example in photography: An African savannah sunset where orange skies, blue shadows, green grass, and red soil all meet.
Why it works: Landscape shots with diverse palettes often follow this naturally.

Wildlife photography most often features Monochrome, Complementary, Analogous, and Triadic harmonies. Here’s why these dominate:
1. Monochrome
Why common in wildlife:
Nature often presents itself in a single color palette—think of the golden savannah, snowy landscapes, or a misty forest.
Black-and-white conversions highlight texture, form, and emotion rather than color.
Effect: Strips distraction, puts focus on the subject’s expression, behavior, or movement.
2. Complementary
Why common in wildlife:
Sunlight and shadow naturally create complementary contrasts (e.g., orange light against blue skies, green forests against red/orange subjects).
Many animals themselves have complementary colors—like a kingfisher (blue-orange), or a tiger (orange coat against green jungle).
Effect: Creates drama and impact, making the subject pop.
3. Analogous
Why common in wildlife:
Forests, deserts, grasslands, and rivers often have neighboring hues—greens with yellows, blues with teals, browns with oranges.
This makes scenes feel natural and soothing, because they mimic what our eyes expect in nature.
Effect: Smooth visual flow, immerses the viewer in the habitat rather than isolating the subject.
4. Triadic
Why common in wildlife:
Found in biodiversity hotspots—like birds with red-yellow-blue plumage or coral reef fish with vibrant patterns.
Sunsets, flowers, and seasonal shifts in foliage often create triadic balances.
Effect: Playful, vibrant, dynamic—yet balanced. Perfect for action shots, birds, or festivals of nature (like migration scenes).
In short:
Wildlife habitats naturally align with these harmonies (monochrome mists, complementary sunsets, analogous forests, triadic bird colors).
These schemes create balance + emotion, which is why they’re universally powerful in wildlife storytelling.
Can a Camera Capture Real Color Harmony?
Yes, but with limits.
Your camera sensor records the light spectrum as it falls on the subject, so the base harmony (e.g., orange tiger against green grass) is naturally captured.
However, sensors are not perfect—they may render colors slightly differently than how our eyes perceive them (different white balance, saturation, or dynamic range).
Harsh light, shadows, or mixed lighting can also “break” the harmony in-camera.
So, while nature often provides natural color harmony, the camera doesn’t always translate it perfectly.
Why Post-Processing Is Needed
Color Correction: Adjusting white balance to neutralize color casts (e.g., a tiger shot at dusk looking too blue).
Color Grading: Enhancing or shifting tones to emphasize harmony (making greens slightly warmer so they complement orange fur better).
Selective Adjustments: Tools like HSL sliders in Lightroom / Photoshop allow you to nudge hues (e.g., making teal water slightly bluer so it balances with orange sunset).
This ensures your photo reflects what the eye experienced and maintains the storytelling harmony.

How to Shift Color to Maintain Harmony
White Balance: The most important. Correcting WB can restore natural harmony (e.g., avoiding too-yellow or too-blue casts).
HSL/Color Mixer:
Hue – shift colors closer to their harmonious neighbors (make a green more teal if you want an analogous teal-blue scene).
Saturation – control intensity (reduce competing colors so the main harmony shines).
Luminance – adjust brightness of specific colors to control dominance.
Split Toning / Color Grading: Add complementary tones to shadows & highlights (e.g., warm highlights + cool shadows).
Selective Brush/Radial Filters: Locally adjust colors to ensure subject pops without breaking background harmony.
Why is Color Harmony Important in Wildlife Photography?
Emotion & Mood – Colors trigger feelings: blues calm us, reds energize us, greens connect us with nature.
Storytelling – A tiger in golden grass tells a different story than the same tiger in cool shade.
Focus & Attention – Harmonious colors prevent distractions; the viewer’s eye goes straight to the subject.
Artistic Identity – Your color choices help define your style as a wildlife photographer.
How to Use Color Harmony in the Field
Observe backgrounds before shooting – Move a few steps to place your subject against contrasting or harmonious tones.
Use light wisely – Golden hour enhances warm harmonies; cloudy skies make cool tones pop.
Simplify – Less is more. Too many competing colors weaken harmony.
Think story first – Ask: Does this color choice support the mood I want to convey?
Color harmony is not just about aesthetics—it’s about storytelling and emotion.
Monochromatic = calm
Analogous = natural flow
Complementary = drama
Split-complementary = balanced tension
Triadic = playful energy
Tetradic & Square = diversity & richness
Warm vs Cool = mood control
Achromatic = timeless impact
Final Thoughts
Color harmony isn’t just for painters or graphic designers — it’s a powerful storytelling tool in wildlife photography. Whether you’re capturing the fiery gaze of a big cat at dusk, the delicate pastels of a bird in spring, or the muted tones of a misty forest, understanding and applying color theory can elevate your images from good to breathtaking.
Remember, nature already offers harmony — our job as photographers is to recognize, frame, and sometimes gently enhance it.
If you want to learn Color Grading, Color Shifting, Advanced level Post Processing for Wildlife Photography, you can join my 1:1 Private Post Processing session


Comments